KATIE
KATIE is the Learning Management System of Luther College.
It is a fully supported Moodle platform with various course management tools built into the interface. CELT has developed KATIE training resources for faculty to assist you with utilizing this tool in your classrooms.
KATIE Quick Start Guide
- Access KATIE through katie.luther.edu.
- Click on your course in the Course overview block.
- Click the Turn editing on button in the upper right to begin editing your course.
- Add files and other content to your course.
- Create course activities like assignments, forums, and quizzes.
- Set up your Gradebook.
- Make your course visible to students.
The most-used resources:
- File: upload a file
- URL: provide a web link
- Label: enables text and multimedia to be inserted into the course page; can display text, images, sound, video, web links and embedded code
Other resources:
- Book: create a multi-page resource in a book-like format, with chapters and sub-chapters
- Folder: display a number of related files inside a single folder, reducing scrolling on the course page
- IMS Content Package: upload an IMS content package as a zip file
- Page: create a web page resource using the text editor; can display text, images, sound, video, web links and embedded code
Activities are modules that you can add to KATIE that require the students to interact with the tool. Activities can be graded, although grades are not required to us an activity.
The most-used activities:
- Assignment: collect files and text for assessment
- Forum: discuss and assess
- Quiz: administer online tests and quizzes
- External tool: connect to other online learning platforms like VoiceThread, Chalk & Wire, Google Assignments, and your textbook content
Other activities:
- Attendance: add your class sessions and record student attendance
- Chat: have text-based, real-time synchronous discussions
- Choice: ask a single question and offer a selection of possible responses (polls, sign-ups for topics or groups)
- Database: students create, maintain and search a collection of entries (i.e. records)
- Glossary: participants create and maintain a list of definitions, like a dictionary, or collect and organize resources or information
- Lesson: deliver content and/or practice activities in interesting and flexible ways
- Open forum: students can respond anonymously to forum discussions
- Questionnaire: construct surveys using a variety of question types, for the purpose of gathering data from users
- SCORM package: enables SCORM or AICC packages to be uploaded as a zip file and added to a course
- Survey: provides a number of verified survey instruments to gather data from students that will help you learn about your class and reflect on your teaching
- Wiki: enables participants to add and edit a collection of web pages; can be collaborative, with everyone being able to edit it, or individual, where everyone has their own wiki which only they can edit
- Workshop: enables the collection, review and peer assessment of students’ work
How to Organize Your KATIE Page
Add Content and Adjust Your Settings
Add Content to Your Katie Course
- In your course, click on the Gear icon and choose Turn editing on.
- Go to a topic and choose Add an activity or resource.
- To add a file:
- Choose File from the list and click Add.
- Type in the Name that will appear on the course page.
- Add a description if you would like.
- Drag a file from your computer to the drop field, or click on the drop field, choose Upload a file, and browse to the file on your computer.
- Click Save and return to course.
- To add a link:
- Choose URL from the list and click Add.
- Type in the Name that will appear on the course page.
- Add a description if you would like.
- Paste or type the link into the External URL field.
- Click Save and return to course.
Copy Content From One Course to Another
Use the Sharing Cart block:
- In the course with the content you would like to transfer:
- Turn editing on.
- If you don’t see the blue navigation menu on the left side, click the three-line “hamburger” button at the top left of the page to make it appear.
- From the list, choose Sharing cart.
- You will now see little shopping baskets next to each item in your course. Click the basket next to the item(s) that you want to move.
- The item(s) should now be listed in the Sharing Cart block in the right column of the page.
- Go to your new course.
- Repeat steps 2-3 above to add the Sharing Cart to your new course. You will now see the shared item(s) in the block in your new course.
- In the Sharing Cart block, click the Copy button next to the quiz that you want to add to the new course. It is the button furthest to the right in the icons next to each item.
- You will now see a box with an arrow in it at the end of each topic of your course. Click on the box that is in the topic that you would like to house your item.
- The item will be copied and show up at the bottom of that topic box.
- Move the item up in the topic, if it makes sense for you.
To make your KATIE course visible to your students:
- Log into KATIE.
- On your dashboard, browse to your KATIE course. If it is not visible, it will be on the last page of your courses.
- Click on your course.
- Click on the Gear icon and choose Edit settings.
- Set Course Visibility to Show.
To change your course format:
- On your main course page, click on the Gear icon.
- Choose Edit settings.
- Expand the Course format section
- Set Format to your desired format.
Recommended Format Types
Topics Format (default)
A topic section is created for each week of class. Click the pencil to rename the topic and press Enter.

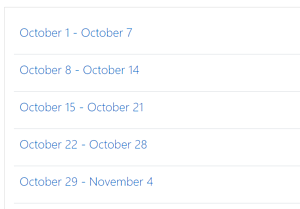
Weekly Format
Each section title is one week. The dates are based on the starting date of the course.
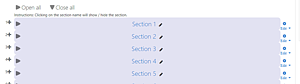
Collapsed Topics Format
Each section is collapsed behind a bar. Click the arrows to expand the section.
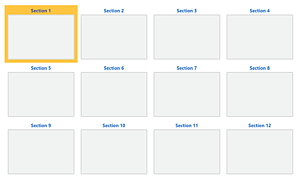
Grid Format
Each section is collapsed and hidden behind an image; the images are arranged in a grid. Click on the section image to see the section.
Things to consider before you start…
- Will you be changing up your groups at any point during the course of the class?
- Do you want to assign members to groups? Or would you like KATIE to randomly assign people to the groups?
- What size do you want your groups to be? Or do you instead want to define a certain number of groups?
Create Random Groups in KATIE
- On your main course page, go to the Gear icon and choose More…
- Go to the Users tab and choose Groups.
- Click the Auto-create groups button.
- Create a naming scheme for your groups
- If this is for a specific assignment, pick a naming scheme like “Discussion Forum @” or “Group Presentation #”
- Use @ if you want your groups to be A, B, C… and # if you want them to be 1, 2, 3…
- Set Auto create groups based on to Number of groups if you know how many groups you want. If you know how many students you want per group, set it to Members per group.
- Group/member count: enter the number of groups or members you want, based on your selection in Step 5.
- If you can, check the box to “Prevent last small group.” Leave all other settings as-is.
- Expand the Groupings section. Enter a Grouping name, like Discussion Groups or Final Project Groups.
- Click Preview to review the allocation of students.
- Click Submit to create the Group and Grouping.
Create Groups and Assign Students Yourself
- On your main course page, go to the Gear icon and choose More…
- Go to the Users tab and choose Groups.
- Click the Auto-create groups button.
- Create a naming scheme for your groups
- If this is for a specific assignment, pick a naming scheme like “Discussion Forum @” or “Group Presentation #”
- Use @ if you want your groups to be A, B, C… and # if you want them to be 1, 2, 3…
- Group/member count: enter the number of groups you want to create.
- Expand the Groupings section. Enter a Grouping name, like Discussion Groups or Final Project Groups.
- Click Submit to create the Groups and Grouping.
- You will return to the Groups tab. On this tab, select the first group that you just created.
- Click Add/remove users.
- Select the students you would like to enroll in this group. To select multiple people, hold down the Ctrl or Apple key as you click multiple people. Click the Add button to add them to the group.
- Click Back to groups and continue until you have added all of your students to their groups.
Set Activities (Forums, Assignments, etc.) for Groups
For an Activity You Have Already Created:
- Click the Edit button and choose Edit settings.
- Expand the Common Module Settings section.
- Set Group mode to Separate Groups
- For Grouping, choose the Grouping that applies to this activity.
- Click Save and return to course.
For a New Activity
- Expand the Common Module Settings section.
- Set Group mode to Separate Groups
- For Grouping, choose the Grouping that applies to this activity.
- Continue setting up your activity and click Save and return to course or Save and display.
Move a few items with the Sharing Cart
In the old course with the content you would like to move:
- Turn editing on.
- If you don’t see the blue navigation menu on the left side, click the three-line “hamburger” button at the top left of the page to make it visible.
- Scroll all of the way to the bottom of that blue menu and click “Add a block…“
- From the list, choose Sharing cart.
- You will now see little shopping baskets next to each item to your course. Click on the basket next to the content item(s) that you want to move. It should now be listed in the Shopping cart block in the column on the right of the page.
Go to your new course and follow steps 1-4 above to add the Sharing cart to your new course. Next:
- In the Sharing cart in the right column, click the Copy icon next to the item that you want to add to the new course. It’s the icon farthest to the right; it looks like two pieces of paper.
- You will now see a box at the end of each topic with an arrow inside of it. Click on the box that corresponds to the topic that you would like to contain the new item.
- The item will be copied into that topic and will show up at the bottom of the list.
Once you have added the item(s) to your course, delete it from the Sharing cart.
Import an entire course
- In your new, empty course, go to the Gear icon and choose Import.
- You will see a list of courses. You can search for the course that has the content you would like to import at the bottom of that list. I recommend searching by term (ex: 2021FA or 2019JT) or by the 5-digit number at the beginning of your course title.
- Once you find your course, select and choose Continue.
- Import settings: choose the content you would like to import. Then choose either:
- Jump to final step: everything in your previous course will be imported. You are done!
- Next: You will be taken to a list of the topics, resources, and activities in your course. You may select only those items that you wish to import. Click Next at the bottom of your screen. On the next page, you will see the list of items to be imported. Click Perform import. You are done!
Use User Overrides to change time limits, open/close dates, due dates, and number of attempts in KATIE Quizzes and Assignments.
- Click on the Quiz or Assignment.
- Click on the Gear icon.
- Choose User overrides.
- Click on the Add user override button.
- Begin typing the student’s name to select them from your list of participants.
- Set your overrides.
- Click Save.
Add Activities and Assessments
To create an assignment in KATIE:
- Go to the Gear icon and Turn editing on.
- In your topic, click Add an activity or resource, choose Assignment, and click Add.
- Add the Name that will appear on the course page.
- Add instructions and requirements in the Description field.
- Add Additional files, like templates, instructions, or rubrics. (optional)
- Click the Enable box and set the Due date. Note that time is in 24-hr time. (optional)
- Submission types:
- Online text: creates a textbox that students will type into and submit.
- File submission: students will upload and submit a file.
- Set the number of files.
- You can also specify a specific file type. Click Browse to select.
- Feedback types:
- Feedback comments: a text box that you can type comments into. Students will see this in the assignment module and in the gradebook.
- Annotate PDF: the student’s file is turned into a PDF that you will view and read within KATIE. You can add annotations and comments to the file, which is saved for the student.
- Feedback files: you can upload a file for the student, like a Word file with comments that you have added.
- Grade:
- Set the number of points the assignment is worth.
- Click Save and return to course.
To change the due date or allow another attempt for a student, add a User Override.
Ready to grade? See how to grade submitted files in KATIE.
Google Assignments
An alternative to the Assignment activity that allows students to submit Google Docs, Slides, Sheets, and other files from Drive. Copies of student submissions will be saved in Google Drive folders that are accessible by students and instructors. Easily control access to assignment versions and grade in Google using the Google interface; grades are automatically added to your KATIE gradebook. Grade at your own pace and release grades for the entire class at once.
What is Google Assignment? How does it work?
How to Add a Google Assignment Activity
- Turn editing on in your KATIE course.
- In a topic, click Add an activity or resource
- Choose External Tool from the list and click Add
- In the Preconfigured tool list, choose Google Assignment LTI (note: don’t name the activity yet)
- Click the Select content button.
- You may be prompted to link your Norse Apps account. Select Continue to authorize the link.
Be sure you choose your luther.edu email address. Personal Gmail accounts will not work with Google Assignments. - The Google Assignment setup page will open in a new window. Fill in the following details:
- Total points the assignment is worth
- Due date
- (optional) You may also attach a file from your Google Drive that can serve as a template file, like a worksheet or data set. Once students open the Google Assignment, they will each receive their own copy of anything that you attach.
- Confirm the assignment details and click Create
- The setup window will close and you will return to the KATIE settings page from step 4.
- Give your assignment a name.
- [optional] Expand the Grade section to adjust how the activity will appear in the KATIE gradebook.
- Don’t want the assignment to show up in your KATIE gradebook? Change the Type drop-down to None.
- Want to customize the assignment for your gradebook? Change the Maximum grade and/or choose an existing Grade category. Note: the Maximum grade does not have to match the point total that you entered in step 7.2. If they are different, the points will scale to match the KATIE max grade. Ex: 9/10 in the Google Assignment becomes 45/50 in the KATIE gradebook.
- Scroll to the bottom to Save.
Instructions for Students Submitting Google Assignments
Direct students to the Google documentation or write your own instructions using it as a source.
How to Grade Submitted Google Assignments
- On your course page, click on the Google Assignment to see the total submissions.
- Click the Open in Assignments button to begin grading.
- Click on a student name to grade a particular submission.
- In the toolbar on the right, you will see a list of the files the student submitted, an icon to click to enter grades and overall feedback, and a comment bank where you can save comments that you frequently use.
- Comment on the student’s submission using the comment function in Google, enter Overall feedback in the text box in the panel on the right, and enter a grade in the Grade box.
- Continue to grade student submissions.
- When you are ready to release the grades and feedback to students, click Return to notify the students that their submissions have been graded.
Want to test it out as a student? Enroll yourself in the practice course.
What you’ll need to know ahead of time:
- What type of forum will be used?
- Will posts be anonymous?
- Will users be expected to attach files to posts?
- Will posts be rated, and if so, how will ratings be aggregated?<
- Should users be able to subscribe to the posts or keep track of which posts have been read?
General Forum Settings
- Select the appropriate “forum type”
- Standard forum displayed in a blog-like format [default] – An open forum where anyone can start a new discussion at any time, and in which topics are displayed on one page with “Discuss this topic” links.
- A single simple discussion – A single discussion topic which everyone can post replies to. Cannot be used with separate groups.
- Each person posts one discussion – Each student can post exactly one new discussion topic, which everyone can then reply to.
- Q and A forum – Students must first post their perspectives before viewing other students’ posts. Once students have posted their answer, they may read and reply to other students’ posts.
- Standard forum for general use – An open forum where anyone can start a new discussion at any time.
Attachments and Word Count
- Choose maximum number of file attachments
- Select whether or not the word count will be displayed
Subscription and Tracking
- Choose subscription mode.
- Optional – each user decides if they will receive emails when others post to the forum.
- Forced – everyone receives emails and cannot unsubscribe.
- Auto – everyone is subscribed initially but can choose to unsubscribe
- Disabled – subscriptions are not allowed.
- Select whether or not users can track read and unread posts
Ratings: Use options here to select how posts will be rated. The aggregate type defines how ratings are combined to form the final grade in the gradebook.
- Average of ratings: the mean of all ratings
- Count of ratings: the number of rated items becomes the final grade. Note that the total for all ratings cannot exceed the maximum grade for the activity.
- Maximum: the highest rating becomes the final grade.
- Minimum: the smallest rating becomes the final grade.
- Sum: all ratings are added together. Note that the total for all ratings cannot exceed the maximum grade for the activity.
What you’ll need to know ahead of time:
- When will users take the quiz and how long will they have to do so?
- What types of questions will be on the quiz?
- Should the questions be randomly shuffled for each user?
- Will the quiz have multiple pages, and if so, how many questions per page?
- What kind of feedback will users receive? Will they receive general feedback based on their grade, or feedback for each question based on their answer?
- When will users be able to review their results, and what information will they view?
- Will multiple attempts be allowed, or only one?
Quiz Settings
Timing: Settings here allow you to designate the open and close times for the quiz, as well as a time limit and any grace period for submissions. To give a student extra time, you will add a User Override when you are done setting up the quiz.
Grade: Here you can choose how many attempts are allowed and which attempt will be graded.
Layout: This is where you can choose the order in which the questions will appear and how often the questions will appear on a new page.
Question Behavior:
- Shuffle within questions: Select whether or not the order of answers (in questions like multiple choice or matching) are shuffled
- How questions behave: If you want users to enter an answer to each question and then submit the entire quiz, before anything is graded or they get any feedback, select “Deferred feedback” mode. If you’d prefer that users submit each question as they go along to get immediate feedback, and if they do not get it right immediately, have another try for fewer points, select “Interactive with multiple tries” mode.
- Each attempt builds on the last: If multiple attempts are allowed you can select this option so that each new quiz attempt will contain the results of the previous attempt. This allows a quiz to be completed over several attempts.
Review Options: The options here allow for complete customization of which feedback will be seen at what point during the quiz process.
Overall Feedback: Use this area to offer feedback based on the grade users receive.
Quiz security and ensuring online testing integrity
I want my students to hand-write their exam or problems and turn them in to me.
Students could take photos of their exam papers at the end of the time period and upload those screenshots to a KATIE assignment within a certain time period following the exam.
I don’t want my students to use their textbook for my quiz.
Timed quizzes are the single most effective tool for eliminating this strategy. A timed quiz requires the students answer the questions in a certain amount of time. If you give enough questions and make the time short enough, they won’t have time to look up all the answers. One recommendation is about 30 seconds per multiple-choice question.
I’m worried that students will give each other the answers or work together.
Shuffle question and answer order and/or pull questions randomly from a test bank (i.e. by bank contains 100 questions and each student will receive a random selection of 50 of them). If my screen doesn’t look like yours, then it’s harder for us to quickly share answers all of the questions. A timed quiz also makes it harder for the two of us to cheat if we have different questions and we only have a short amount of time to answer.
Students might share the correct answers after they take the exam.
In the settings in KATIE, set that the student can only see how many points they received and whether their answers were right after the quiz is closed and no one else will be taking the quiz.
Best practices to follow:
- Enable Open and Close dates/times for your assessments.
- Enable a Time limit for your assessments.
- Set up a question bank and pull random question sets.
- Only provide feedback and attempt information to your students after the quiz is closed.
- Increase the number of open-ended or essay-style exam questions. Open-ended questions generally require students to have a greater understanding of the material and make cheating more difficult.
Many web-based teaching and learning tools can be integrated with KATIE via a method called Learning Tools Interoperability (LTI). You can connect these tools to your KATIE course with the External tool activity. If you need assistance, contact KATIE Support at helpdesk@luther.edu.
External Tools Available in KATIE
- Chalk&Wire
- Google Assignment
- LinkedIn Learning
- Macmillan Achieve
- McGraw Hill Connect
- Sage Vantage
- VoiceThread
How to Request a New Tool for KATIE
Contact your publisher representative and ask if they have LTI options available that integrate with Moodle. Then contact KATIE Support to begin the integration process.
Please note:
- All third-party tools must pass a security review before installation.
- KATIE Support can provide initial setup and troubleshooting help but only the publisher can assist with configuring and troubleshooting the content on the publisher’s platform.
Communicate With Your Students
Quickmail
Steps:
- In your course, click on the Gear icon and choose Quickmail.
- Add the enrollees to receive your email to the Selected recipients column.
- Add a subject for your email and add your content to the Message box. You may also add an attachment to the email.
Note: Quickmail will not send attachments that are larger than 10 mb. If you attach 2 or more files, they will be sent as a single .zip file. - Choose Send email or Save as draft.
Assess Student Work
Setting up your KATIE Gradebook
Things to consider:
- What categories (such as quizzes, exams, daily work) need to be included?
- Will the categories be weighted, and if so, how?
Faculty generally think about grades in two different ways. See the resource that best matches how you structure and assign grades in your course. If you use both strategies, start with the points-based tutorial.
- I use points – each assignment is worth a certain number of points, which determines how it contributes to the course total.
- I use percentages – assignments and categories are worth a certain percentage of the final grade. Individual assessments may be graded by points or with letter grades.
Important notes:
- By default, the gradebook does not include empty grades in calculations. If a student did not turn in an assignment, you must enter a “0” for that item.
- The KATIE gradebook only understands points. You cannot enter letter grades, check/plus/minus, credit/no-credit, and have it aggregate into the course total.
Before you begin:
- Start with your syllabus. Do you have categories to create? Which items will be turned in through KATIE and which will be completed in a different way?
- What are the total points possible in your gradebook?
- How many points will individual assessments be worth? Remember: the KATIE gradebook can calculate points.
To set up your gradebook:
- On your main course page, go to the Gear icon and choose Gradebook setup.
- If you have already added activities that have points associated with them, you will see those items here.
- If there are items that you do not want to count toward the grade in your gradebook, click the tickbox in the Weights column and set the weight to 0.
- To create your categories, like Papers or Quizzes, scroll to the bottom of the page and click the Add category button.
-
- The total points for the category will populate as you add your individual assessments to the category.
- To add graded items that will not be turned in using KATIE, click the Add grade item button, create a Name, set the total number of points that the item is worth, and, if it goes in a category, choose that category from the Grade category dropdown menu.
- If your students will be turning in graded items using the Assignment module, create those assignments on the main course page. In the Grade section, select the Grade category if you have created categories in your setup.
- You can duplicate items like Assignments, Forums, and Quizzes on the main course page.
- Set up your first paper, quiz, or forum without assigning any due dates.
- On the main course page, click the Edit button and choose Duplicate.
- Click the pencil next to the name to rename the item.
- Once you have created all of your duplicates, go in and enable due dates, open and close dates, and other item-specific information.
Before you begin:
- What categories (such as quizzes, exams, daily work) need to be included?
- Will the categories be weighted, and if so, how?
- Will items be completed through KATIE resources (assignments, quizzes, forums) or some other way?
To set up your gradebook:
- On your main course page, go to the Gear icon and choose Gradebook setup.
- If you have already added activities that have points associated with them, you will see those items here.
- If there are items that you do not want to count toward the grade in your gradebook, click the tickbox in the Weights column and set the weight to 0.
- To create your categories, like Papers or Quizzes, scroll to the bottom of the page and click the Add category button.
- Wait to set your percentages until you have added all of your categories and items.
- To add graded items that will not be turned in using KATIE, click the Add grade item button, create a Name, set the total number of points that the item is worth, and, if it goes in a category, choose that category from the Grade category dropdown menu.
- If your students will be turning in graded items using the Assignment module, create those assignments on the main course page. In the Grade section, select the Grade category if you have created categories in your setup.
- You can duplicate items like Assignments, Forums, and Quizzes on the main course page.
-
- Set up your first paper, quiz, or forum without assigning any due dates.
- On the main course page, click the Edit button and choose Duplicate.
- Click the pencil next to the name to rename the item.
- Once you have created all of your duplicates, go in and enable due dates, open and close dates, and other item-specific information.
- Once you have created your categories and items, check the tickboxes in the Weights column and add the correct weight. Once you have set the new weight for all of your items, scroll to the bottom and click the Save button.
Grade Submitted Files
- Click on the assignment and choose View submissions.
- Click the blue Grade button for submissions that you are ready to grade. Enter a grade, and if enabled, type Feedback Comments into the comment box and/or Annotate the PDF that is created.
- Be sure to save when you are done.
Rating Forum Posts
- Click on the forum. Depending on the type of forum you chose when you configured the forum, you may also need to click on the question or discussion thread.
- For students who have submitted posts, you will be able to choose a rating. You will be able to apply a rating between 0 and the maximum grade you set for this forum.
- If you would like to see all posts that a student has made in the class, click on your Participants list, click on the student’s name in the list, and then choose Forum Posts in the Miscellaneous box.
Entering Grades for Grade Items
If you need to provide grades for assessments that do not use one of the KATIE resources (e.g. assignment, quiz, forum), you will create a grade item in your Gradebook setup.
When you are ready to enter grades for that grade item, you have a few options.
- In the Grader report, click Turn editing on. In the solid boxes, add grades. The dotted boxes are for feedback.
- Go to Grades, then click the Single view tab. You can select the item to grade, then enter the grades and feedback in the boxes.
Grade Online Text Assignments
- Click on the assignment and choose View submissions.
- Click the blue Grade button for submissions that you are ready to grade. Enter a grade, and if enabled, type Feedback Comments into the comment box and/or Annotate the PDF that is created.
- Be sure to save when you are done.
There are several options to review how your students are interacting with your KATIE course. Some of the most popular are listed below.
View Logs for Students in Your KATIE Course
- On your main course page, click the Gear icon and choose More…
- In the Reports section, choose Logs.
- In the second box, All users, choose the participant you would like to see logs for.
- In the All events drop-down menu, choose Participating to see events or actions related to a students learning experience, like submitting an assignment or posting to a forum.
- in the All activities box, you can choose a specific activity to see how a student has interacted with it.
- If you would like, download these logs by scrolling to the bottom of the page and selecting your preferred format for Download table data as
View Course Participation Reports in KATIE
- On your main course page, click the Gear icon and choose More…
- In the Reports section, choose Course participation.
- In the Activity module drop-down, choose the activity.
- In Look back, choose how far back you want to see activity for.
- In Show only, choose Students.
- Click the Go button.
- You will now see which students have and have not interacted with the activity.