An Iowa College in the Liberal Arts Tradition
Image Scaling
Please read the directions below for adjusting image dimensions with Adobe Photoshop.
Step 1
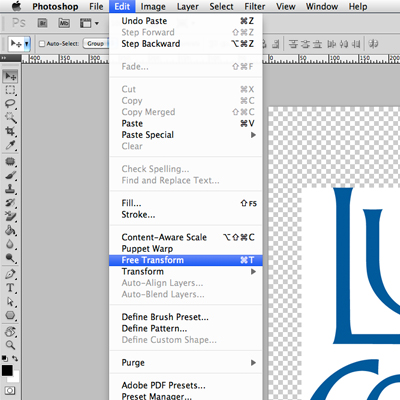
After loading your image into Photoshop, select "Edit" from the top menu and click "Free Transform." Squares will appear on the image's edges and centers.
Step 2

Once the squares appear, click on a corner square only and hold down the "Shift" key as you drag with your mouse to change the image dimensions. To make it smaller, drag your mouse into the image. To make it larger, drag your mouse away from the image. Once the image is adjusted to your preferred dimensions, press "Enter" and release "Shift" to save the changes.
Additional Photoshop guides can be found on the official Adobe Help website.
Note: Holding down the "Shift" key with adjusting image dimensions can be used in other programs, such as Microsoft Word and PowerPoint. When decreasing or increasing image dimensions, hold down the "Shift" key to ensure the image stays within proper proportions.
If you seek further assistance with adjusting image dimensions, please contact us at [email protected].